Connections Manager
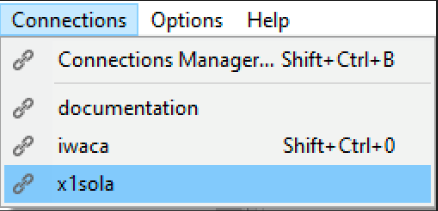
You can use the Connections main menu item to connect to remote servers.

Figure. Connections Main menu.
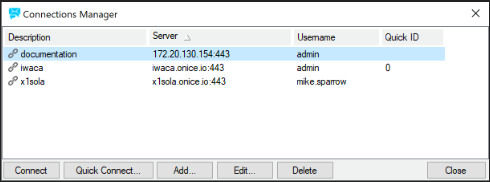
The Connections Manager allows you to pre-define any connections you require so you can quickly connect to a pre-configured server. In this way you can create Bookmarks.

Figure. Connections Manager dialog.
|
Field |
Description |
|---|---|
|
Connect |
Select a server and click the button to connect to this server. |
|
Quick Connect |
Click the button to open the last used connection. |
|
Add |
Click the button to add a new connection. The Remote Server dialog opens. |
|
Edit |
Click the button to perform changes in the selected connection. The Remote Server dialog opens. |
|
Delete |
Select a server and click the button to remove this connection from the list. |
|
Close |
Click the button to close the dialog. |

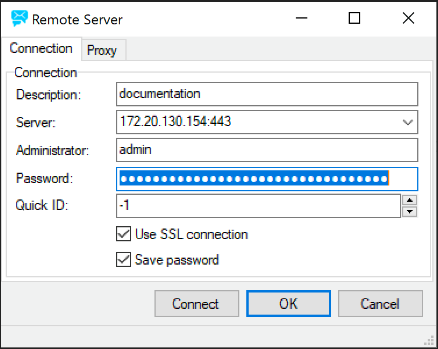
Figure. Connection tab in Remote Server dialog.
|
Field |
Description |
|---|---|
|
Description |
Enter some descriptive text. |
|
Server |
The hostname or IP address with the appropriate port for the server you wish to connect to. Note: The connection is made over the Web Control port and by default this is port 80 in all version 10.x.x servers and prior to these versions the default port was 32000. If you are using any other port than 80 please ensure you specify the <server:port>, e. g.: demo.icewarp.com:32000 |
|
Administrator |
An administrator account for the remote server. |
|
Password |
The password for the administrator account. |
|
Quick ID |
Optionally specify a QuickID for this connection, just digits are allowed. Connection Manager allows to sort connections according to this field. QuickID also works as a keyboard shortcut - pressing Ctrl+Shift+QuickID will bring up the Connect dialog for this server. Note: If you click the Connect icon (within the toolbar), the connection with the lowest Quick ID defined is opened. |
|
Use SSL Connection |
If checked, all data transfer will be SSL encoded. |
|
Save password |
If checked, your password will be saved so you do not have to enter it each time you connect. Warning: USE WITH CARE – not recommended on public machines! |
|
Connect |
Click the button to connect to the selected remote server. |
|
OK |
Click the button to save performed changes. |

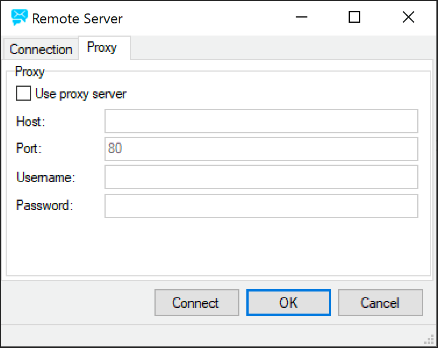
Figure. Proxy tab in Remote Server dialog.
|
Field |
Description |
|---|---|
|
Use proxy server |
Check this if you need to access your server via a proxy server. |
|
Host |
The hostname or IP address of the proxy server. |
|
Port |
The hostname or IP address of the proxy server. |
|
Username |
Fill in credentials to the proxy server, if required. |

